Discourse as Your First Rails App
Update April 4, 2018
The Discourse Vagrant development install is not longer supported and maintained.
Current development install guides can be found at meta.discourse.org for Windows, macOS, and Ubuntu.
Original Post:
If you're a developer, but have never touched Ruby on Rails, we understand how you feel. We were there once! Sometimes diving into a new language and codebase can make you feel like this cat going into a bath:

Discourse has a great, supportive community on GitHub and meta.discourse, and we're here to help. This is our first guide to setting up a local Ruby on Rails environment, custom tailored to begin dabbling in Discourse.
Step 1: VirtualBox
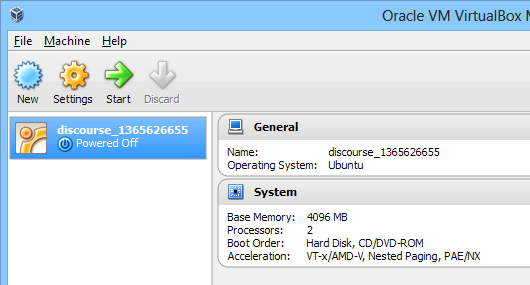
For those who don't do it on a regular basis, It can be intimidating to set up a *nix flavored environment. For us, the path of least resistance lies in the safety of a Virtual Machine, a doorway into an entirely different operating system. We recommend VirtualBox. It's free, open source, and runs on Windows, Linux, Mac and Solaris. Download a copy from the VirtualBox site here:
www.virtualbox.org/wiki/Downloads
As of this writing, 4.3.26 is the latest and works for us. After you've downloaded and installed it, there are a couple of things to know which will help your VM's performance.
- Use a Solid State Drive (SSD). A VM emulates an entire system. There's a performance cost to this emulation, a little in CPU and memory, but mostly in disk I/O. You can get big improvements in VM speeds by moving from traditional disks to a solid state drive.
- Have two drives. If you install VirtualBox to run from your primary drive, and you run a VM that also resides on that primary drive, they're going to fight for hard drive resources. The more your primary disk is tied up, contending between the management of resources necessary to run VirtualBox and the emulated resources inside the VM, the slower your performance is going to be. If you can, try keeping your working directory (of Discourse and the VM) off of the primary disk. In a perfect world, your secondary disk would also be a SSD!
- Increase the VM memory. The VM image we set up defaults to 1 GB of memory, which makes it friendly to run on 4 GB machines. But this is the practical minimum -- performance will be a lot better if you can ramp the VM memory up to 2 GB or even 4 GB. To do so, change your system's
DISCOURSE_VM_MEMenvironment variable to the desired amount of memory.
Also, we recommend a development machine with about 8 GB of physical memory. VMs are hungry and eat ram like Hippos eat marbles.
Step 2: Vagrant
With VirtualBox installed, it's now time to bring a VM to life. Discourse maintains all the information necessary to wire up a VM within the Discourse codebase itself!
It does this through the magic of Vagrant, another free open-source tool which is used to both package and initialize a VM with all the necessary configurations in place. Thanks to Vagrant, there's no need to figure out if you have the correct version of Ruby, or if Rails is up-to-date, or even how to install nginx, thin, or any of the other bits and pieces that make up Discourse.
It's all in Vagrant, stored within the Vagrantfile, and comes up with with the ease of a single command line. For the purposes of working with Discourse, you'll need Vagrant 1.7.2 or higher. Download it from the Vagrant download page:
Install should be self-explanatory. Go ahead and do that now. We'll wait.
Step 3: Git
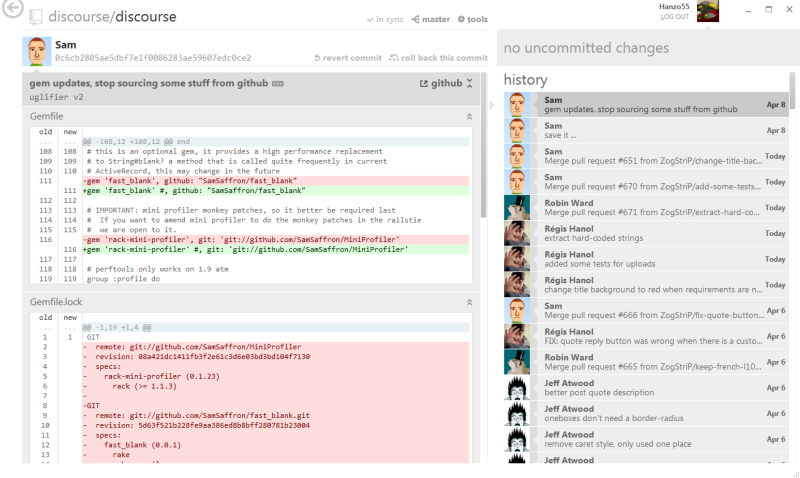
Source control is vital, not only as a means of tracking changes and protecting yourself from change, but also perhaps more importantly as a way to make collaboration and contribution easy.
First timers to Git can find it is a bit intimidating, even if you have previous experience with Subversion et al. If you want the easiest experience to start, we recommend the official GitHub clients:
Once installed, head to the Discourse repository on GitHub and click the Clone in Windows / Mac button:
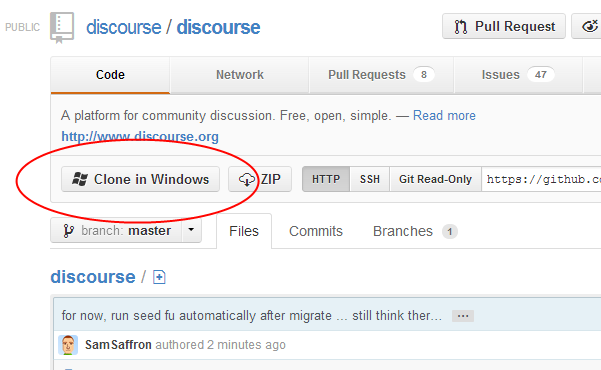
This will pull a copy of the repo down to your machine, and your GitHub tool will load it into its local repositories. Clicking on the "repositories" section on the left, under "local" will take you to all your cloned repos. To peek inside the repo, click the blue arrow, just to the right of the thumbtack:
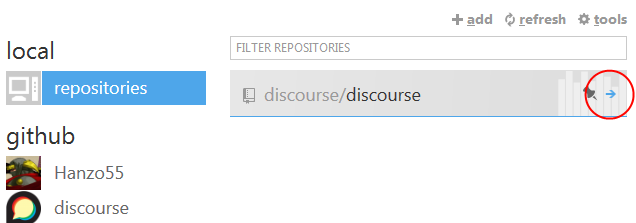
The complexities of Git will need an entirely new blog post, so we'll leave that to the experts. For now, three tips:
- If possible, set up your working folder on a disk other than where you installed VirtualBox. Do this through the tools option along the top of the GitHub application (look for the gear icon in the screenshot above).
- Hover over the repo to see the current working folder for the project:
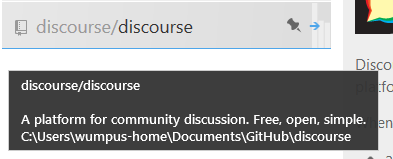
- To open a command shell in the project, right click the project and select open a shell here, or use the project tools (gear icon) menu again.
Keep those last two points in mind, because you'll need them for the next section!
Now that you have cloned the Discourse project locally, you also have our official Vagrant configuration along with it. This will drive the VM in VirtualBox. Let's put all the pieces of this puzzle together, shall we?
Step 4: Running the VM and Connecting to It
Using the GitHub for Windows or Mac tools (gear) menu for the project, select open a shell here.
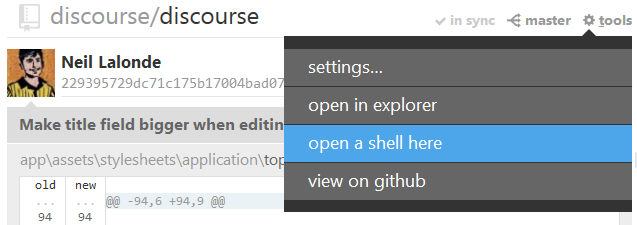
This will give you a command prompt at the current project folder. From there, type:
vagrant up
This will kick the VM into motion. Vagrant will connect to the official Discourse site, download the VM image we've prepared (note: this may take a while), extract it, and enable all the subsystems necessary to bring the environment to life. VirtualBox may prompt you a few times, so go ahead and accept its requests.
Once the VM is up, you'll be back at the command prompt.
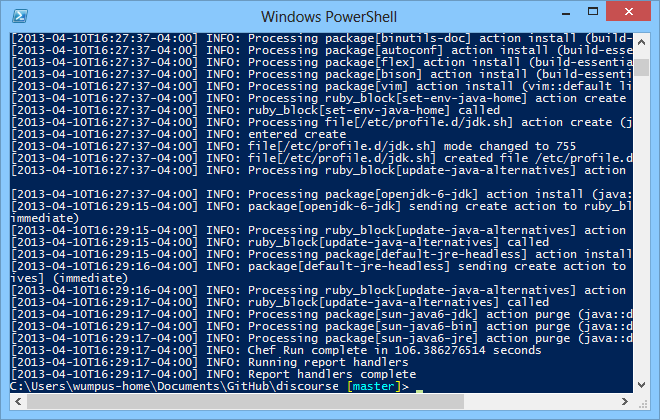
Now, it's time to connect to the VM and start up the Rails server. From the shell you already have open in the project folder, type:
vagrant ssh

Once inside, a few more commands is all it will take. Change to the vagrant directory:
cd /vagrant
Now it's time to interact with Ruby on Rails. Invoke the Rails installer, like so:
bundle install
Next, tell Ruby on Rails to migrate the development database schema into your local repo. We do this via rake, which is Ruby's version of make, boasting Ant-like features.
bundle exec rake db:migrate
At long last, it's time to bring up the Rails server, ready to accept HTTP requests.
bundle exec rails s -b 0.0.0.0
Our VM config causes this Rails server to begin listening for requests on port 4000. So once the server is up, open up a web browser on your local workstation and navigate to http://localhost:4000
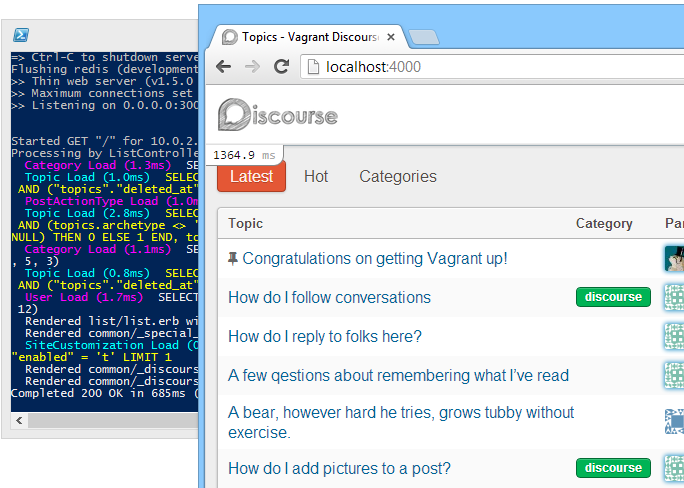
Voila! As you can see in the screenshot above, Discourse is indeed running locally off of port 4000, and in the background, you can see the guts of Discourse working away within the SSH client that you used to launch the server.
The initial request may take a while as Discourse begins to initialize its subsystems and start the caching processes; first page loads of 5 to 10 seconds are not uncommon. However, if you're seeing page load times well beyond this, let us know what your PC configuration is. The Discourse community is actively looking for tweaks and improvements for better VM performance.
Step 5: Shutting Down
When you're done for the day, Ctrl+C will kill the Rails server, exiting you back to the command prompt from within the VM. To finish up, type:
exit vagrant halt
This will exit your SSH session, then end the VM and free up its resources.
Congratulations! You now have a working copy of Discourse, ready for you to hack away at any time, and a complete Ruby on Rails environment to facilitate said hacking.
Now go forth and hack -- and please consider contributing any cool stuff you build back to the project as pull requests!